
Last updated on May 24th, 2023 at 04:29 am
To factory reset a Kwikset Halo lock, here is the quickest solution:
Begin by making sure the Kwikset halo lock is powered off
If it is not, press and hold the power button for 3 seconds to turn it off
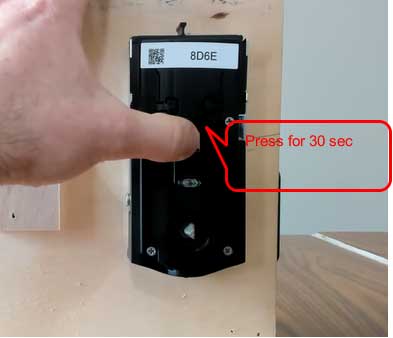
Next, locate the reset button on the back of the lock
It will be small and recessed into the body of the lock
Use a paperclip or other small object to press and hold the reset button for 30 seconds
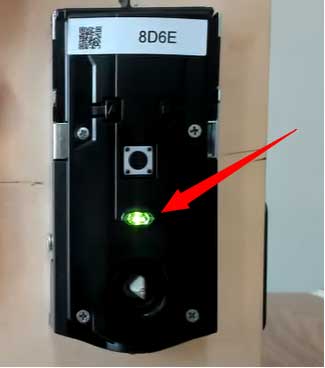
The light on the front of the lock should flash indicating green that it has been successfully reset
How Do I Reset Kwikset Halo Lock to Factory Settings?
I know you have tried kwikset keypad reset process but you have forgot the keypad lock. Now on, you need to go through the factory settings, there are a few different methods you can try.
First, if your lock is equipped with a Smart-Key cylinder, you can use the Smart-Key learning tool to reset the cylinder.
This will clear all current keys from the cylinder and allow you to create new ones.
If your lock does not have a Smart-Key cylinder, you’ll need to manually reset the pins.
Instructions for both methods are outlined below:
To reset your Kwikset lock using the Smart-Key learning tool:
1) Begin by inserting the old/existing key into the SmartKey learning tool.
2) With the key fully inserted, press and hold down on the learn button until LED light starts flashing (approximately 5 seconds).
3) While still holding down on the learn button, insert the new key into the learning tool.
4) The LED light will stop flashing once the new key has been successfully learned. You can now remove both keys and test out the new one in your Kwikset lock.
How Do You Change the master code on a Kwikset Halo Smart Lock?
Kwikset Halo Smart locks are one of the most popular types of smart locks on the market. They’re known for their ease of use and reliability, but like any other type of lock, you may occasionally need to change the code. Here’s how to do it:
Start by putting the master key into the Kwikset Halo lock and turning it to the left. This will disengage the locking mechanism and allow you to remove the back cover of the lock.
Once you’ve removed the back cover, you’ll see a small circuit board inside.
Locate the “Code” button near the top of this board (it may be labeled with a “+” sign).
Press and hold down this button while also entering your new four-digit code on the keypad to change. Release both buttons when you’re done entering your code.
Replace the back cover of your Kwikset Halo lock and test out your new code to make sure it works!
You may get more insights from my Kwikset halo troubleshooting guideline
Kwikset Halo Factory Reset Not Working
If you’re having trouble resetting your Kwikset Halo, don’t worry – you’re not alone.
Many people have reported this issue and fortunately, there are a few things you can try to get it working again.
First, ensure that the batteries in your Kwikset Halo are fresh.
If they’re not, replace them and see if that does the trick.
If that doesn’t work, try doing a hard reset of your Halo by holding down the button on the back for 20 seconds.
This will erase all of your settings and allow you to start from scratch.
If neither of those solutions work, then read my in-depth article on Kwikset halo smart lock offline.
Related post: Kwikset powerbolt 2 all troubleshooting
How Do I Change My Kwikset Lock Code After Factory Reset?
To factory reset, you’ll need to locate the reset button on the back of the lock. Once you’ve found it, press and hold it down for five seconds.
Next, use a paperclip or other small object to press and hold the learn button located on the side of the lock.
After that, enter in your new four-digit code. Finally, release both buttons and test out your new code by trying it out on the door.