
Last updated on May 24th, 2023 at 03:40 am
If you’re an Apple HomeKit user, the Kwikset Premis Smart lock will be a great choice. This lock will ensure your home’s security and convenience.
Anyway, first you should know some about its manual and user guide. How can I install it?
Don’t worry. We will describe a step-by-step guide that you can perform to install your Premis lock in this article.
So why late? Let’s get the Kwikset Premis installation manual and try it on our own before calling a locksmith.
Kwikset Premis manual installation instruction
Do you know the installation process of Kwikset Premis is so easy that you can try it yourself without a professional?
If you follow our below steps perfectly, we assure you that you can install it without any problem.
However, first, you should collect some tools for installation. These are,
- Phillips head screwdriver
- Rulers

You may need some extra tools depending on your applications. These are,
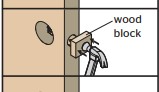
- Hammer
- Woodblock
If you have collected all the necessary instruments, go to the main installation steps.
How to install a Kwikset Premis lock?
Now follow these below steps perfectly to set up or install your lock. You can read the manufacturer’s information to get basic knowledge.
Step 1: Prepare your door
Do you already have an old deadbolt lock? If yes, remove it using a screwdriver. It will be your first step.
Then clean any dirt around the area to make a perfect place for installing your lock.
Step 2: Check the door dimensions and measurement
To ensure the perfect dimensions of your door, follow the below specifications. Ensure your door backseat, door lock hole, and door edge hole are at the exact sizes:
- Measure to ensure the diameter of the door hole is either 2-⅛ or 1-½(54 mm or 38 mm) inches.
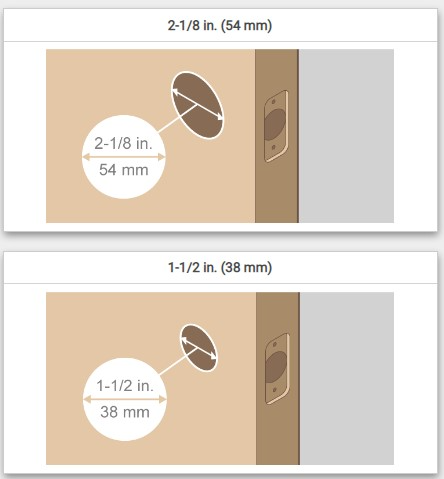
If the door hole diameter is about 1-½ inches, some additional steps will be needed.
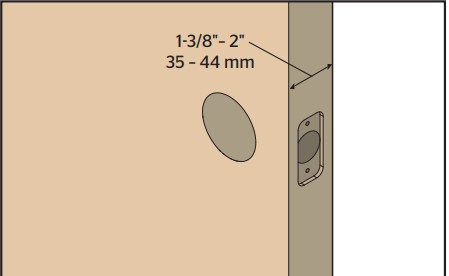
- Measure to confirm the backseat of the door is either 2-⅜” or 2-¾”(60 mm or 70 mm) wide.

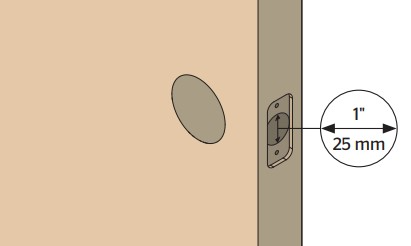
- Ensure the door edge hole is 1 inch (25 mm).
- Measure to confirm the door thickness is either 1-⅜ or 2 inches (35 mm or 51 mm).
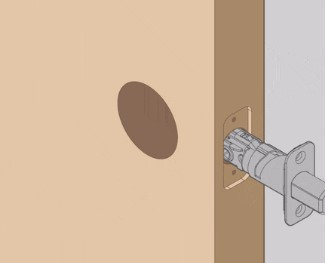
Step 3: Install the latch bolt and strike
- Take your latch and keep it in front of the door hole. Ensure the latch faceplate is flush against your door edge.

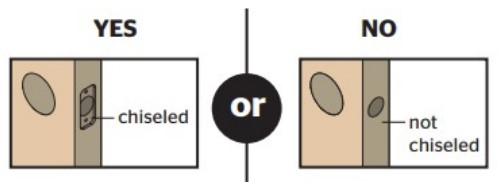
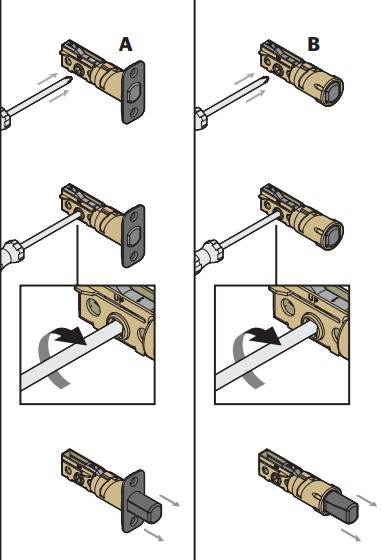
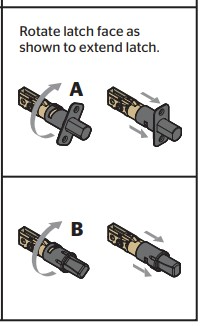
- Check if your door edge is chiseled or not. You can use latch A if it is chiseled and latch B if not.
Then you need to extend the latch bolt if it is not retracted or extended. To do it, see the below image to learn the technique:
- Now notice the D-shaped hole. Is it in the centered position? If it is centered, any extra adjustment for the latch bolt isn’t required.
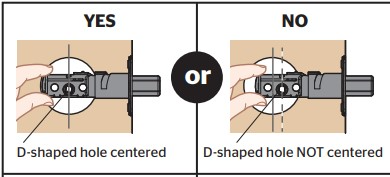
But if not, you need to adjust it. To do it, rotate and extend your latch faceplate by following the below image.
- Now install the latch and secure the screws.
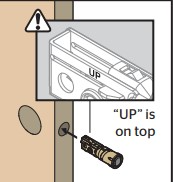
- Keep ‘Up’ on the top facing upward to position the latch properly.

- You can use a Hammer to tap on the latch to place it positioned.
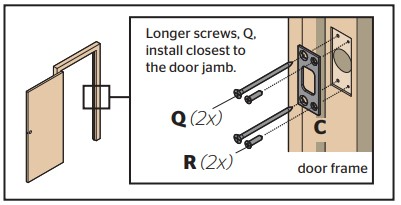
Install strike plate:
- Now take the strike plate and insert it onto the door frame. In that case, confirm the door edge hole is at least 1 inch or 25 mm deep.
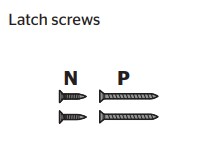
- Then secure it with the provided longer screws.
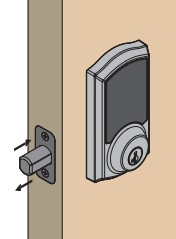
Step 4: Install the exterior assembly
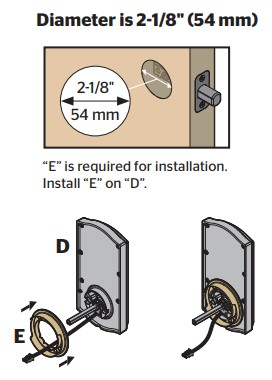
- Check your door hole diameter. Is it 2-⅛ inches or 1-½ inches?
- If the diameter is 2-⅛ inches(54 mm), take the adapter ring. Now install it onto the exterior assembly like the below image.
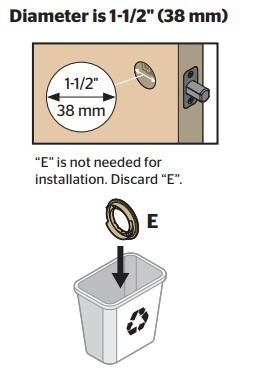
- But if it is 1-½ inches(38m), you won’t need to install the adapter ring. So, discard it away.
- Now install your exterior assembly and mounting plate. To do it,
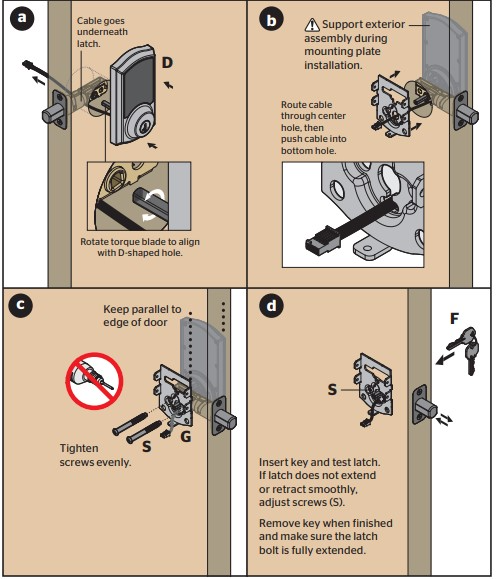
- Hold the exterior assembly against the latch and feed the cable underneath the latch.
- Then on the other side, insert the mounting plate, and feed the cable and spindle through the center hole.
Now push or slide the wire into the small notch at the bottom. In this step, you need to support the exterior assembly.
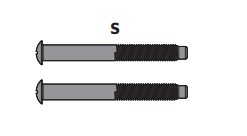
- Now take the below mounting bolts, and secure the mounting plate to the door and exterior assembly tightly. Don’t over-tighten them.
- Finally, test the latch by placing the key. If the latch bolt doesn’t extend or retract perfectly, check the screws and adjust them if needed.
- Take out the key if you are ensuring the latch bolt will retract.
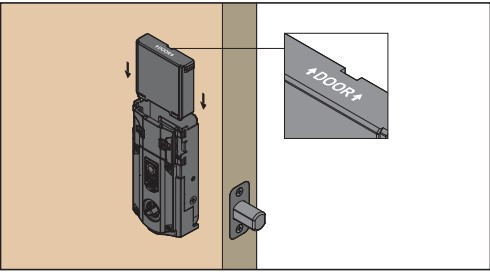
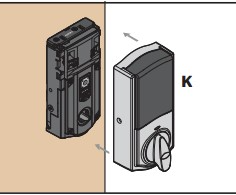
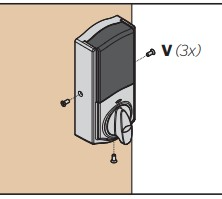
Step 5: Install the interior assembly
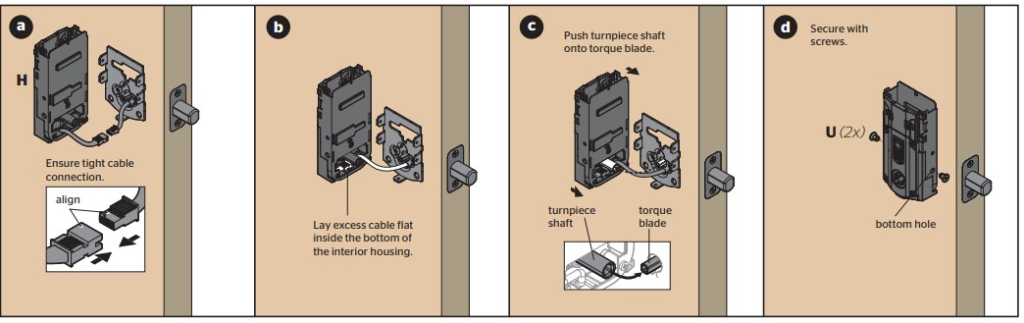
- Take out the battery cover and battery pack from the lock. At that moment, you should keep the turnpiece in the vertical position.
- Insert the internal part onto the mounting plate by connecting the cable properly. Ensure the connection is proper and tight. Yet, don’t tighten more.
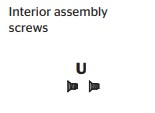
- Keep the extra cable flat under the internal housing. Now secure it perfectly with the supplied screws.
Step 6: Install the batteries
- Take the 4 AA batteries and insert them into the battery pack.
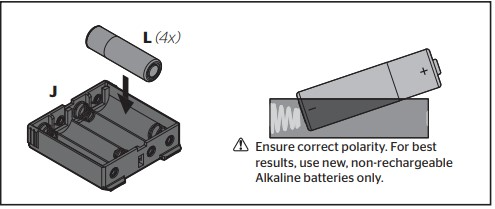
Use a non-rechargeable alkaline battery to get better results. Even ensure the battery polarity is correct.
- Keep your door unlocked and open. Then place the battery into the battery compartment.
Step 7: Perform the door-handing process
This step guides your lock the orientation of your door. So it is essential to operate the lock perfectly. Now, let’s see the process below:
- After installing the 4 AA batteries into the lock, after a while, the latch bolt will start to extend and retract on its own.
Thus the lock learns the door’s orientation, and it is called the door-handing process.
But how can you know the process is successful? Ok, let’s get the way:
- If the handling process is successful, you will notice the checkmark sign or a single column of digits will be flashing on the touchscreen.
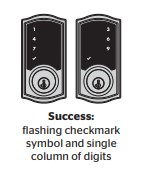
- And if it is unsuccessful, the touchscreen will flash an X pattern. In that case, you can execute the door-handing process again.
- If it is still unsuccessful, it will be better to consult with a professional.
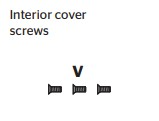
Step 8: Insert the interior cover
- Take the cover, and place it into the internal lock.
- Take these screws and secure the lock.
Step 9: Rekey the lock(optional)
In this step, you may rekey your lock by following our rekeying process.
The Kwikset Premis touchscreen lock has a SmartKey feature. So the rekeying procedure will be the same.
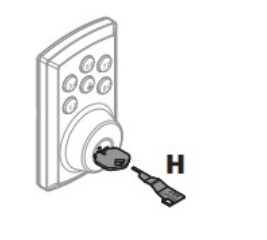
If you rekey your lock, it will be worked with the existing key.
Step 10: Download the Premis App and pair the lock to your Smartphone
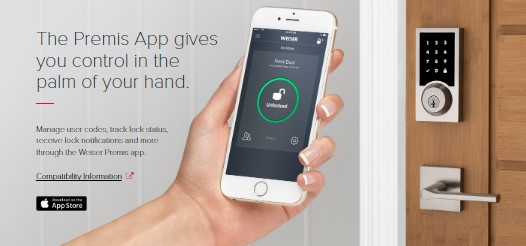
In this step, download the Premis App to manage your lock settings and user codes. To do it, go to the App Store and install or download it.
Read the instructions inside the Premis App to pair your Smartphone to your lock.
Thus the installation manual or setup process of your Kwikset Premis lock is over. Now your lock is ready to use and enjoy!
Conclusion:
Is the article helpful to you? We hope this attractive, easy, and detailed installation guide will help you start to install your Premis lock without a professional.
Just follow the above guide and try these easy attempts. Yet, if you find trouble in any steps or can’t get it anymore, you should contact a locksmith.
Or comment us below. We will try to help to fix your issues! Enjoy our Kwikset Premis manual and user guide.